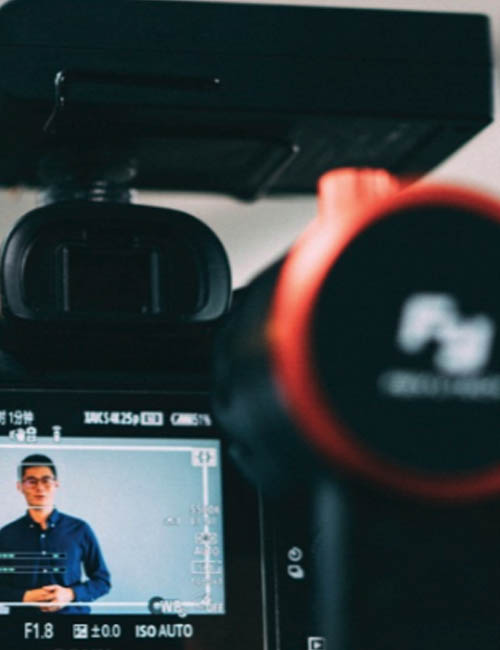
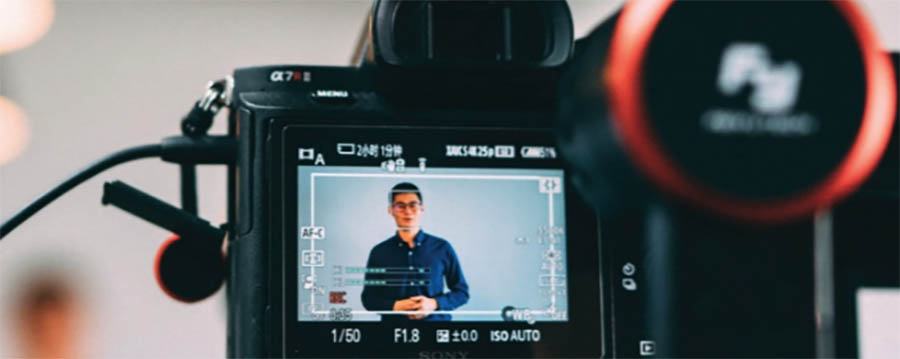
Clients’ expectations regarding how researchers bring customers to life has dramatically changed over the last decade, with video becoming a critical part of that expectation. Using video, qualitative researchers can quickly communicate insights in an impactful, memorable way, helping clients relate to, empathize with, and then to internalize insights.
We have the opportunity and obligation to humanize data, especially in this time of Big Data. What better way to represent people than to allow them to represent themselves? The combination of their words and their visuals make the insights we uncover indisputable and undeniable. The insights become amplified and more memorable. Here are tips to help you become more comfortable using video.
 Hearing Is More Important than Seeing
The quality of your video is only as good as the quality of your audio. You can always add visuals to express a thought, but you cannot recreate a thought without adequately capturing the quote. When making decisions on equipment, make absolutely sure you are using the highest quality audio equipment within your budget.
Sennheiser and Rode are often recommended by videographers. Systems with clip-on microphones are convenient and inconspicuous. Affordable audio options include Rode VideoMic Me directional microphones for smart phones. These professional grade microphones, designed for personal video cameras and personal audio recorders, minimize background noises. Check out the following links for additional information:
Low end (for phone): Rode VideoMic Me: qrca.org/VIEWS-040
Mid Range: Rode VideoMic Rycote Lyre: qrca.org/VIEWS-041
Higher Range: Rode VideoMic Pro: qrca.org/VIEWS-042
If taking video is central to your business, consider the Sennheiser G3 lapel wireless mic. If you only invest in one thing, invest in great audio equipment.
Equip Yourself with Good Visual Gear, too
Outside of using your smart phone, which is perfectly adequate for some DIY projects, cameras that do a good job are the Canon VIXIA HF R800 camcorder, the Canon HF R800 and the Panasonic G7. I also cannot say enough about using a small tripod like JOBY with a ball head. This portable piece of gear maintains the stability of the shot and avoids camera shake. Because it is small, it is also easy to move around, giving you flexibility to change position with it.
Getting to Editable Content
There are a few things you can do to make the production process go more smoothly.
Let the participant complete a thought for more compelling video. The long-standing QRC adage, “do more listening, less talking,” comes in really handy when conducting a videotaped interview. When we interrupt someone mid-sentence, it not only changes someone’s course of thinking, it also makes it more difficult and time-consuming to edit the thought when creating video.
Think ahead to the end deliverable. It’s our job as video producers to guide participants to expressing an editable quote. So, after covering a topic area, ask, “How might you summarize what you said?”
Setting the Scene
Tap into your inner videographer and scout the space. Videographers focus on the lighting and background; it consumes them. If available, look for a spot that has good natural lighting. Make sure the lighting illuminates the participant’s face rather than the back or one side, so viewers can see the main subject’s face. After all, a large part of bringing someone to life is fostering an environment for authenticity. Make sure their expressions and emotions shine through.
It can also help set the scene to have a bit of personal or relevant background in the shot. If you’re talking about kitchen appliances, set the shot in the kitchen or in the dining room with the kitchen in the background.
If you’re talking to teens, think about having their favorite sports gear or study materials next to them. If you’re talking about pets, definitely make
sure to include Charlie in the shot! Staging can really help bring out that person’s character.
One of my videographers, John Tiscornia, of John Tiscornia Photography in Seattle, Washington, also has these professional tips:
- Create a basic story board or
outline with each of the topics and shots needed. - Do a few practice interviews to learn how to set up your gear and improve your interviewing skills.
- Scout the interview location ahead of time, if time and budget allow.
- Bring snacks and beverages to the set
if you are spending a significant amount of time there. - Test and check footage and audio levels!
Video Open-ends
When asking participants to answer video open-ends (e.g., in online communities), it’s important to give clear instructions and questions. Unless your project is highly exploratory, the goal is to give enough instruction to get a clear answer, but not so much that the person feels confined. Specific questions we have had success with are:
- “What specific brands [in this category] best reflect your x, y, z values?” or
- “What would make it easier for you to shop for these products?”
Show and tell questions work especially well.
- “Show me a product that makes your life easier. Convince me of its virtues.”
- A standard follow-up question is “What are the reasons you made that choice?”
Giving people a time in which to deliver their answer is also helpful. Less than a minute is sufficient for many answers. Have you ever videotaped yourself talking for one minute? You can say a lot in that short amount of time. The goal here is concise, editable answers.
With any luck, you’ll capture a few people who nail it and reduce your editing time. If you give people too much time, you may not get a concise enough answer.
What to Keep in Mind In-Store
Videotaping shop-alongs can be tricky. Having store approval is key. Since we are often moving up and down the aisles with less control of the shot, I concentrate on the quality of the audio and not as much on the lighting.
Again, think ahead and set yourself up for making the editing process smoother. If it aligns with objectives, make sure to stop along the way to review the person’s thoughts and steps. Conducting an exit interview is another great way to get clear, editable content at the end of the interview.
Arrange, Revise, and Produce
In the end, a great video is all about the insights—and a great edit.
The work you do to prepare for editing is just as important, and more time-consuming, as the editing itself. One guiding principle is that you’ll need about one hour of editing time for every one minute of finished video.
Always, always get timecoded transcripts. It makes it easier to find the exact quotes you need.
There are some great tools out there to help you make editing seamless and even fun. The two main editing software systems recommended by videographers for DIY video producers such as QRCs are Adobe Premiere Pro (Windows and Apple) and iMovie (Apple). They are extremely useful for organizing video and also provide a lot of great online training tools. Other great online resources include low-cost videography classes such as those offered on creativelive.com.
Even in a DIY video project, you can add more richness by including background music. Music without lyrics is less distracting and often works best to create an ambiance. Be careful about audio copyrights. They protect the creative work of the owner. The last thing you need is a lawsuit! Free, legal music sources with creative commons licenses can be found at Free Music Archive or NoiseTrade.
Beyond the Basics with Professional Videography
Some projects may require more polished, produced video.
When using a professional videographer, make sure to allow more time in your timeline. You will want to brief them on your research and video deliverable objectives. You also will want to share the following with them:
- who is the audience,
- what you need to communicate to the audience,
- what impact you want to make on the audience, as well as
- what is your anticipated timeline and budget.
When choosing a videographer, find out how long they’ve been in the business so you get an idea of how much experience they have. Ask: What is their production style? You want this to match your vision of the end product. Most videographers will have a perspective on this. Seeing examples of their work will help you decide if their style matches your vision.
You may need to allow for scouting time and costs—these are associated with prep and setup before you start filming.
In my experience it takes two to two-and-a-half days to receive the initial edit for review. You may need to go back and forth a few times with your videographer or editor to create the final edit, especially if you need client input.
The Final Cut
More and more of our clients expect us to create compelling video of their customers’ authentic stories. Video deliverables are an impactful way to touch the heart and open the mind. Our job is to select the voices of those who best represent the insights we want to communicate. Why not let those customers do the talking through the power of video? If you’ve been hesitant, now is the time to look through that lens and press the record button. It may take a bit of work, but the result will expand your skill set and elevate your end deliverable.
Acknowledgements: Contributions to this article were made by Matt Collins, Hemispheres, and John Tiscornia, photographer and videographer.
Be the first to comment